Prerequisites
Before starting this tutorial, ensure you have the following installed on your system:Claude Desktop
Download and install Claude Desktop for your operating system. Claude Desktop is available for macOS and Windows. If you already have Claude Desktop installed, verify you’re running the latest version by clicking the Claude menu and selecting “Check for Updates…”Node.js
The Filesystem Server and many other MCP servers require Node.js to run. Verify your Node.js installation by opening a terminal or command prompt and running:Understanding MCP Servers
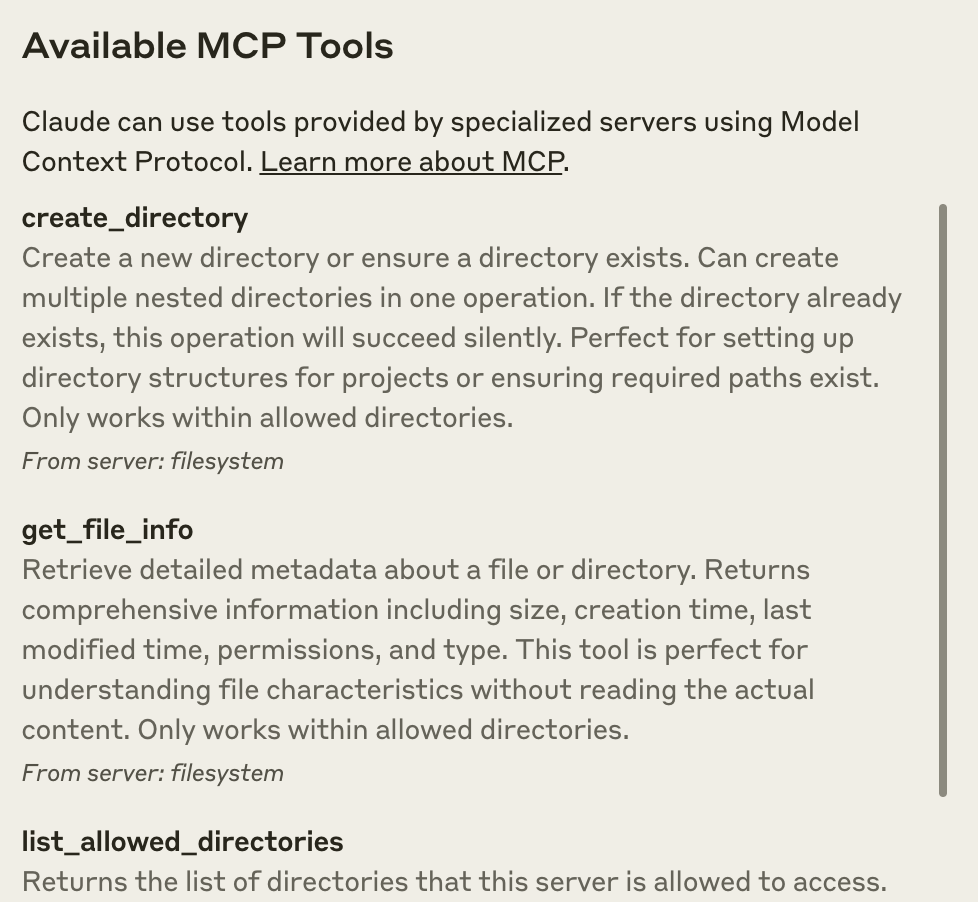
MCP servers are programs that run on your computer and provide specific capabilities to Claude Desktop through a standardized protocol. Each server exposes tools that Claude can use to perform actions, with your approval. The Filesystem Server we’ll install provides tools for:- Reading file contents and directory structures
- Creating new files and directories
- Moving and renaming files
- Searching for files by name or content
Installing the Filesystem Server
The process involves configuring Claude Desktop to automatically start the Filesystem Server whenever you launch the application. This configuration is done through a JSON file that tells Claude Desktop which servers to run and how to connect to them.Open Claude Desktop Settings
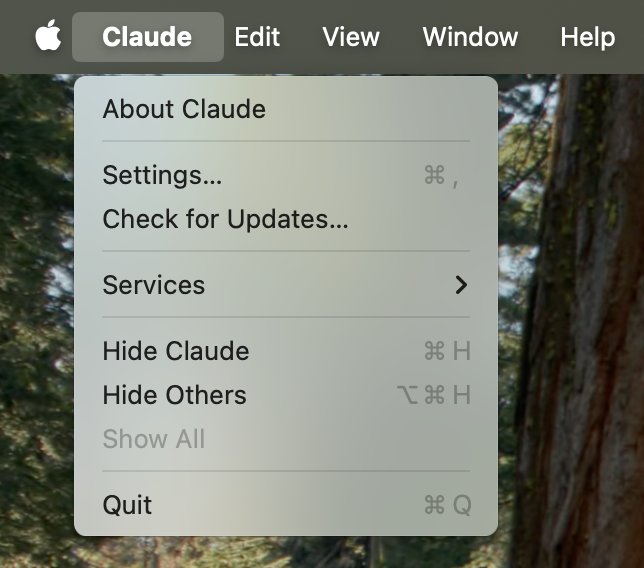
Start by accessing the Claude Desktop settings. Click on the Claude menu in your system’s menu bar (not the settings within the Claude window itself) and select “Settings…”On macOS, this appears in the top menu bar:

Access Developer Settings
In the Settings window, navigate to the “Developer” tab in the left sidebar. This section contains options for configuring MCP servers and other developer features.Click the “Edit Config” button to open the configuration file:

- macOS:
~/Library/Application Support/Claude/claude_desktop_config.json - Windows:
%APPDATA%\Claude\claude_desktop_config.json
Configure the Filesystem Server
Replace the contents of the configuration file with the following JSON structure. This configuration tells Claude Desktop to start the Filesystem Server with access to specific directories:Replace
username with your actual computer username. The paths listed in the args array specify which directories the Filesystem Server can access. You can modify these paths or add additional directories as needed.Restart Claude Desktop
After saving the configuration file, completely quit Claude Desktop and restart it. The application needs to restart to load the new configuration and start the MCP server.Upon successful restart, you’ll see an MCP server indicator  in the bottom-right corner of the conversation input box:


Using the Filesystem Server
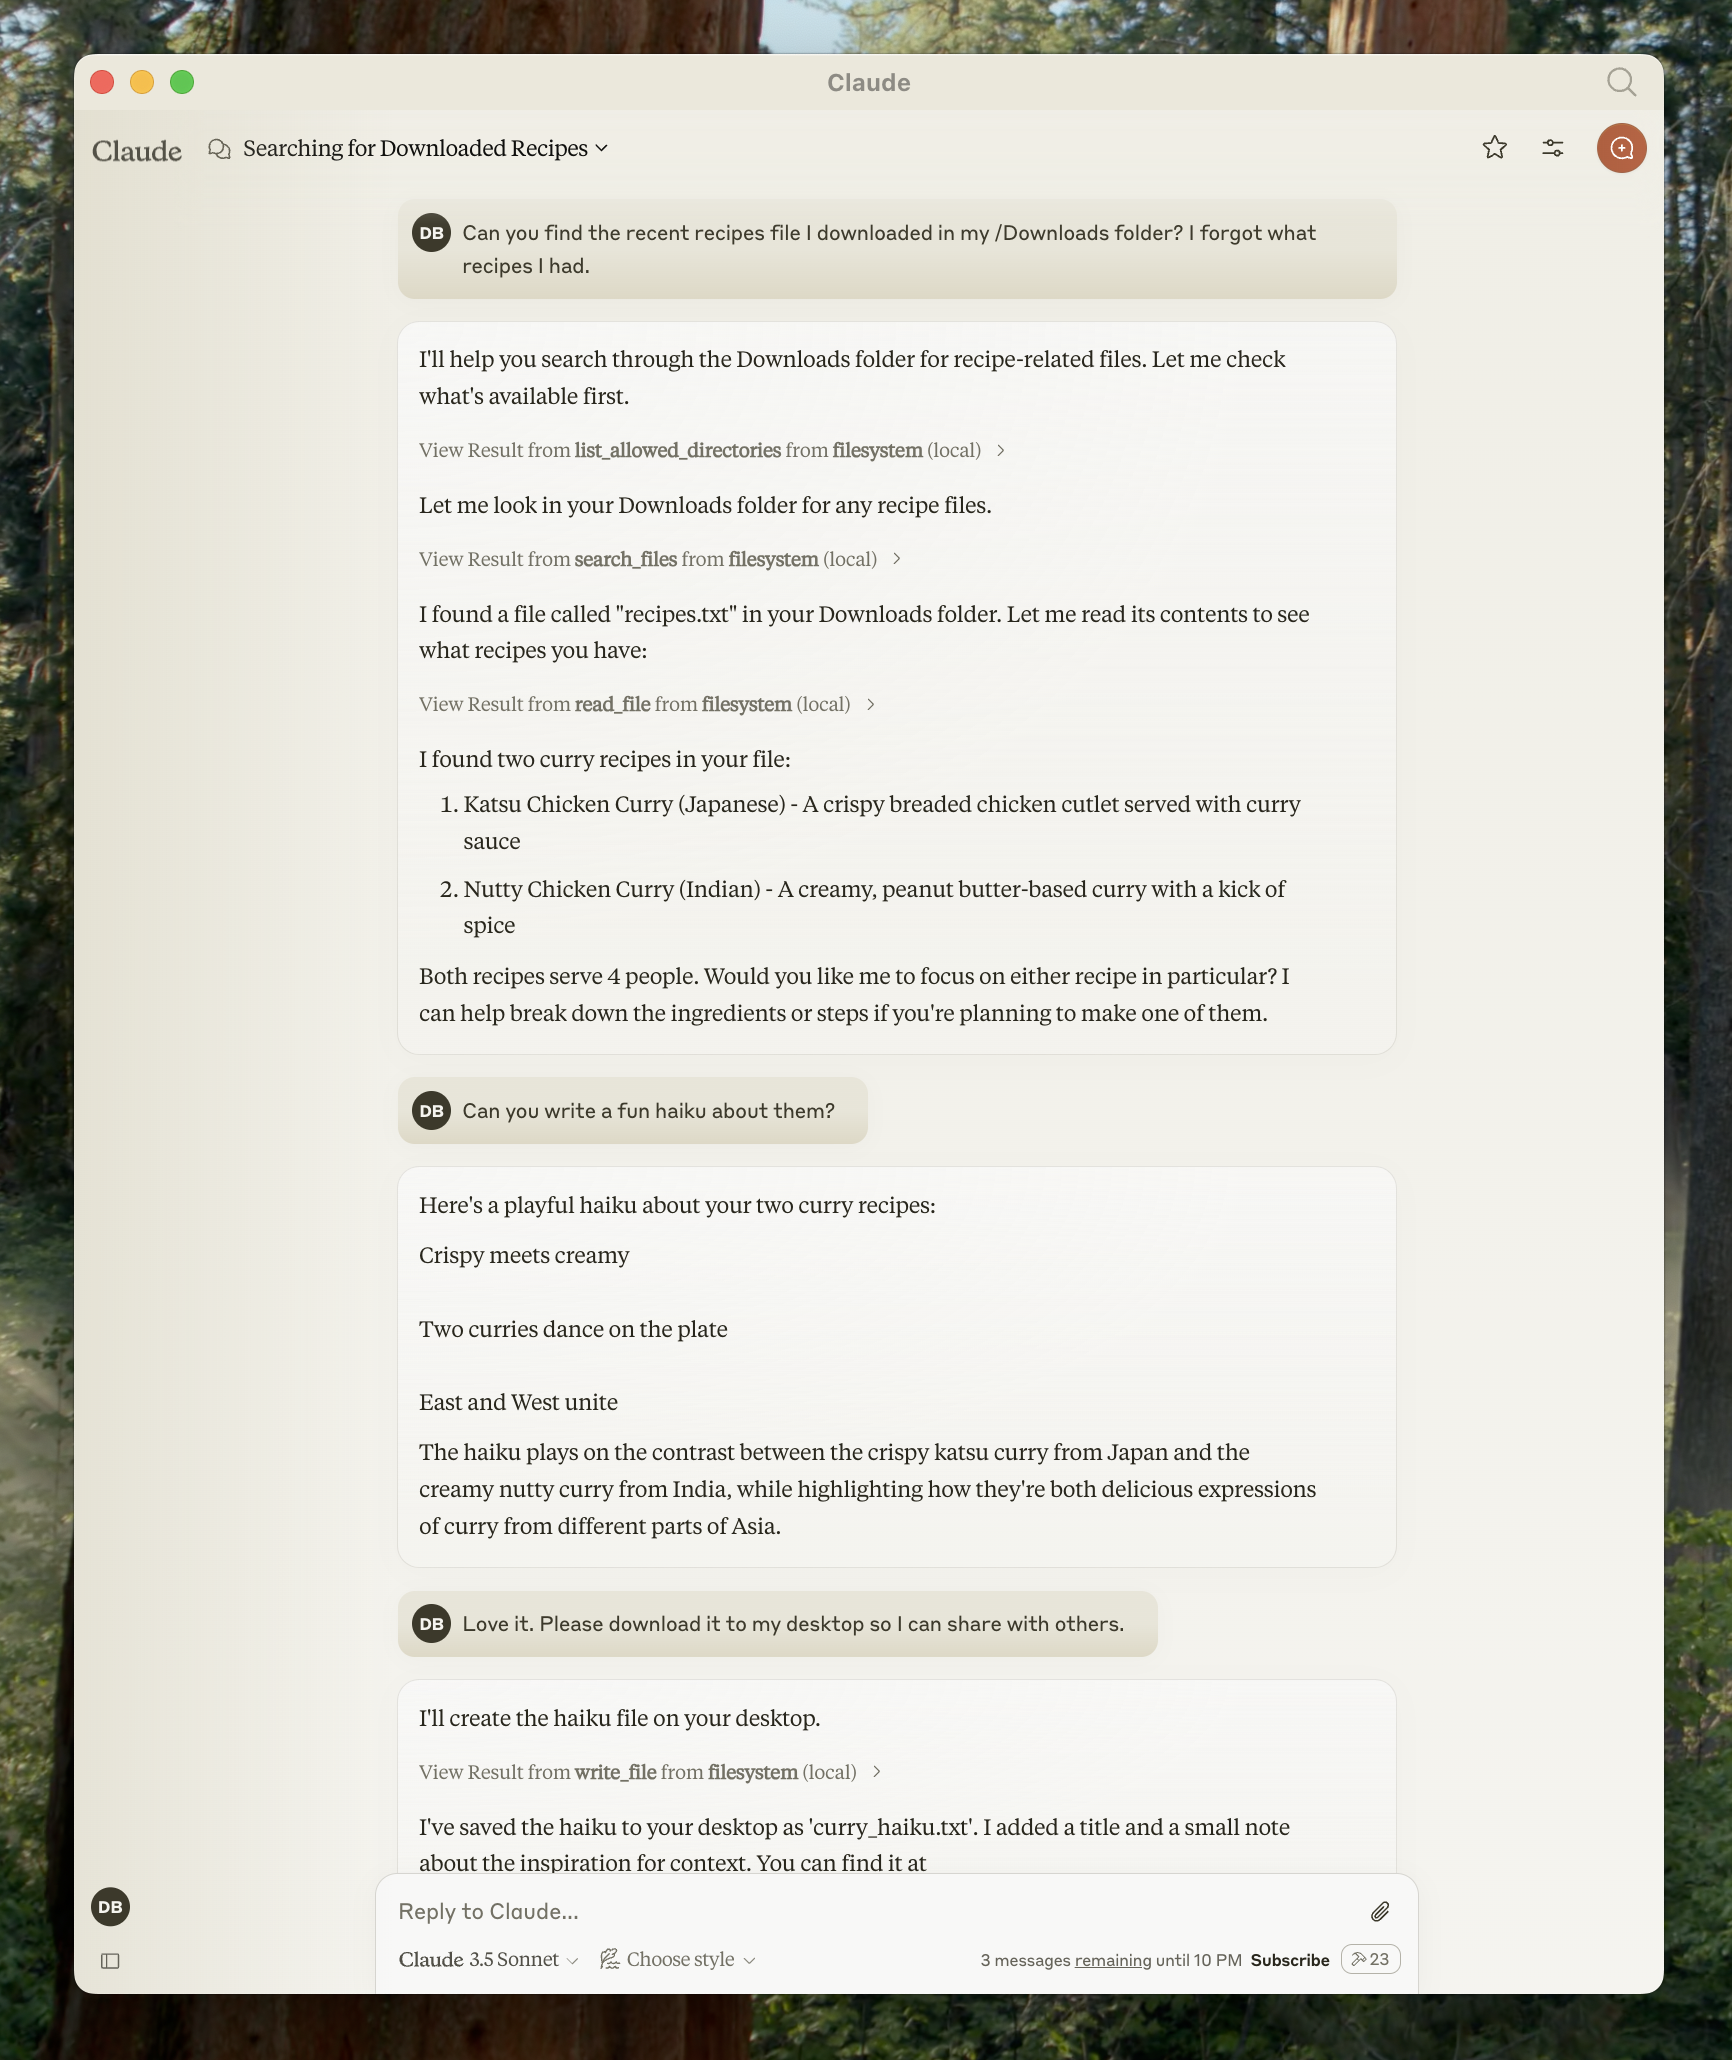
With the Filesystem Server connected, Claude can now interact with your file system. Try these example requests to explore the capabilities:File Management Examples
- “Can you write a poem and save it to my desktop?” - Claude will compose a poem and create a new text file on your desktop
- “What work-related files are in my downloads folder?” - Claude will scan your downloads and identify work-related documents
- “Please organize all images on my desktop into a new folder called ‘Images’” - Claude will create a folder and move image files into it
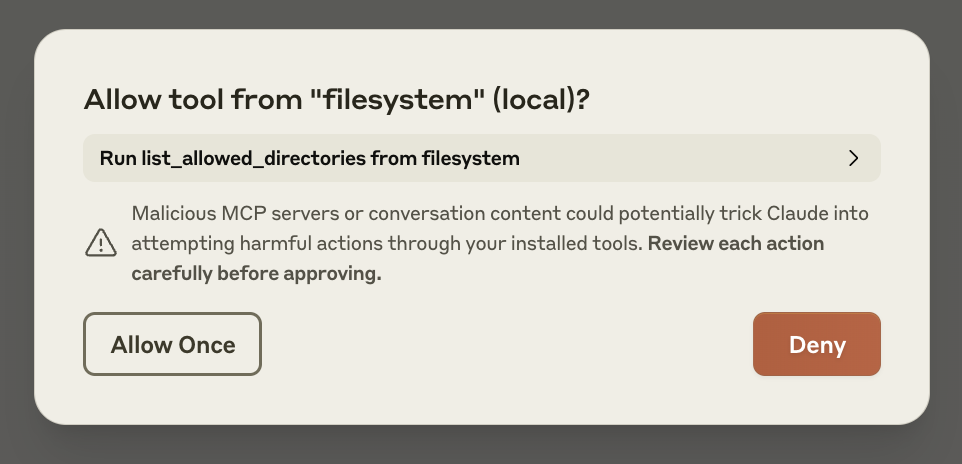
How Approval Works
Before executing any file system operation, Claude will request your approval. This ensures you maintain control over all actions:
Troubleshooting
If you encounter issues setting up or using the Filesystem Server, these solutions address common problems:Server not showing up in Claude / hammer icon missing
Server not showing up in Claude / hammer icon missing
- Restart Claude Desktop completely
- Check your
claude_desktop_config.jsonfile syntax - Make sure the file paths included in
claude_desktop_config.jsonare valid and that they are absolute and not relative - Look at logs to see why the server is not connecting
- In your command line, try manually running the server (replacing
usernameas you did inclaude_desktop_config.json) to see if you get any errors:
Getting logs from Claude Desktop
Getting logs from Claude Desktop
Claude.app logging related to MCP is written to log files in:
-
macOS:
~/Library/Logs/Claude -
Windows:
%APPDATA%\Claude\logs -
mcp.logwill contain general logging about MCP connections and connection failures. -
Files named
mcp-server-SERVERNAME.logwill contain error (stderr) logging from the named server.
Tool calls failing silently
Tool calls failing silently
If Claude attempts to use the tools but they fail:
- Check Claude’s logs for errors
- Verify your server builds and runs without errors
- Try restarting Claude Desktop
None of this is working. What do I do?
None of this is working. What do I do?
Please refer to our debugging guide for better debugging tools and more detailed guidance.
ENOENT error and `${APPDATA}` in paths on Windows
ENOENT error and `${APPDATA}` in paths on Windows
If your configured server fails to load, and you see within its logs an error referring to With this change in place, launch Claude Desktop once again.
${APPDATA} within a path, you may need to add the expanded value of %APPDATA% to your env key in claude_desktop_config.json:Next Steps
Now that you’ve successfully connected Claude Desktop to a local MCP server, explore these options to expand your setup:Explore other servers
Browse our collection of official and community-created MCP servers for
additional capabilities
Build your own server
Create custom MCP servers tailored to your specific workflows and
integrations
Connect to remote servers
Learn how to connect Claude to remote MCP servers for cloud-based tools and
services
Understand the protocol
Dive deeper into how MCP works and its architecture